 View Products
If you’re curious about What is ZoomInfo, It’s essential to understand that ZoomInfo stands out as a leading sales intelligence platform, serving as a foundational tool for countless sales and marketing teams.
ZoomInfo introduced noteworthy advancements, including the integration of GPT technology into its go-to-market platform. This generative AI technology represents the future of software, enhancing your ability to pinpoint high-potential contacts crucial for achieving your business objectives.
This comprehensive guide provides an in-depth exploration of ZoomInfo, covering its features, functionalities, limitations, pricing plans, and alternative solutions. Whether you’re seeking detailed insights or comparing options, you’ll find all you need to know about ZoomInfo right here.
What is ZoomInfo?

Located in Vancouver, Washington, ZoomInfo stands out as a key provider of business intelligence services. It offers a subscription-based model that grants extensive access to detailed business contacts and company profiles.
The company, initially launched in 2007 as DiscoverOrg by Henry Schuck and Kirk Brown, operated under that name until February 2019. At that point, it expanded by acquiring its competitor, Zoom Information, Inc., and subsequently rebranded itself as ZoomInfo.
This strategic move has enabled ZoomInfo to facilitate meaningful connections between businesses and key decision-makers. Boasting a vast database that spans various industries and geographic locations, ZoomInfo has been gaining traction and popularity steadily over the years. For those interested in exploring the rich features and database access ZoomInfo offers, further details on DiscoverOrg cost (now ZoomInfo) can be found by visiting their official website or contacting their customer support.
Purpose and Functionality of ZoomInfo
The primary purpose of ZoomInfo is to aid businesses by providing them with complete and accurate data about companies and professionals. It enables sales, marketing, and recruitment teams to access vital information that aids in lead generation, targeted marketing, and recruitment efforts.
Through a sophisticated data collection system, ZoomInfo transforms billions of unstructured data points into actionable insights, ensuring that businesses have access to the most reliable and up-to-date information.
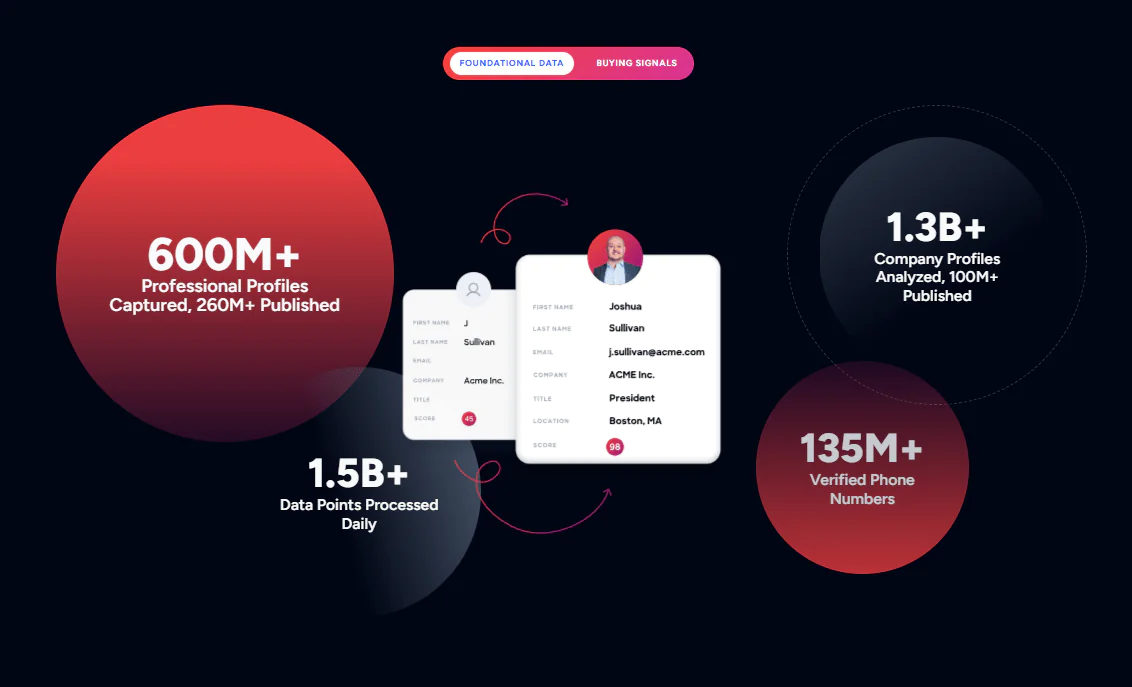
ZoomInfo’s greatest differentiator lies in its ability to gather foundational data with real-time buying signals.
This unique combination ensures that businesses connect with leads who are on the brink of making crucial decisions. With over 600 million professional profiles, 260 million published, 1.5 billion data points processed daily, and 135 million verified phone numbers, ZoomInfo provides a wealth of information to support a variety of business strategies.
Global Reach and Commitment to Excellence
ZoomInfo’s dedication to revolutionizing global data access is underscored by its extensive reach beyond North America.
This expansion equips businesses with the tools to fine-tune their strategies on a global scale, highlighting ZoomInfo’s unwavering commitment to offering enterprises the resources necessary to thrive worldwide.
Important Global Reach Stats
- Company Profiles Outside North America: 34 million
- Professional Profiles Outside North America: 200 million
- Mobile Phone Numbers Outside North America: 45 million
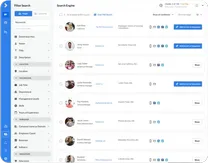
Key Features
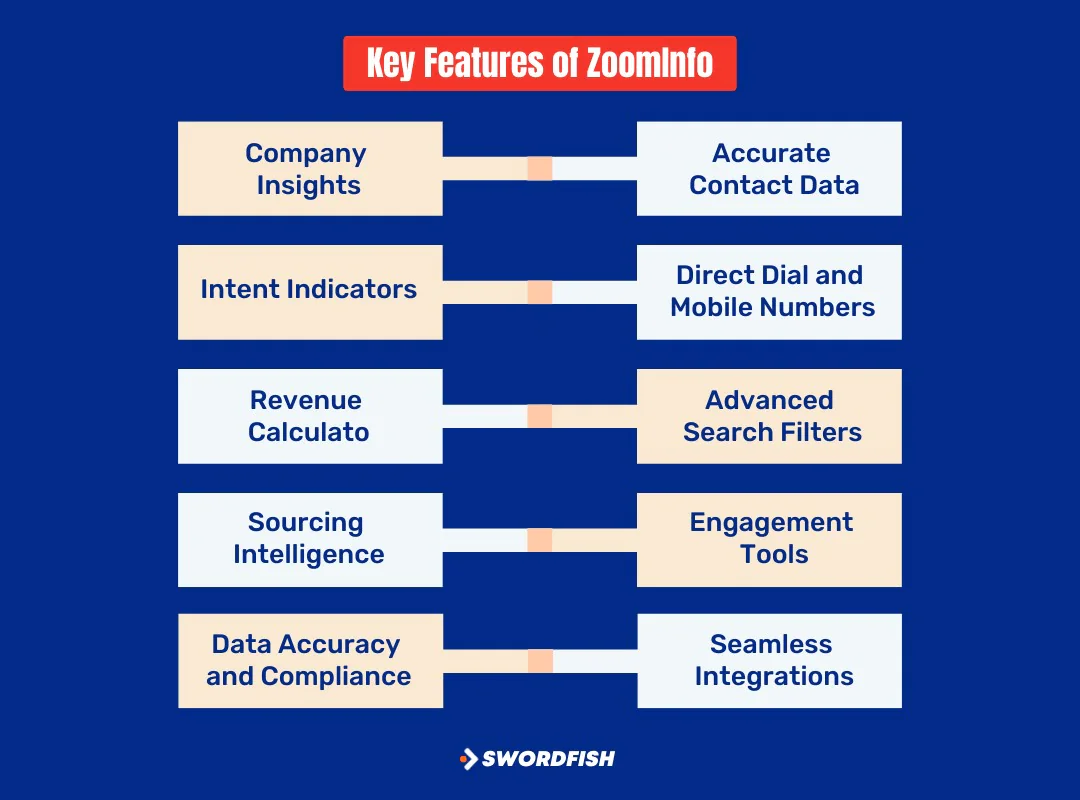
- Comprehensive Company Insights: ZoomInfo provides in-depth information about companies, including size, industry, location, and key contacts.
- Accurate Contact Data: Offers verified and up-to-date contact information for decision-makers and professionals across various industries.
- Intent Indicators: Identifies buying signals and engagement levels to help businesses target leads at the right time.
- Direct Dial and Mobile Numbers: Provides direct contact numbers to facilitate direct communication with prospects.
- Revenue Calculator: A tool that helps businesses assess the potential impact of using ZoomInfo’s services on their sales performance.
- Advanced Search Filters: Allows users to refine searches based on specific criteria like industry, job title, company size, and more.
- Sourcing Intelligence: Provides insights on potential candidates, helping streamline the recruitment process.
- Engagement Tools: Offers tools for outreach, communication, and lead tracking to enhance sales and marketing efforts.
- Data Accuracy and Compliance: Ensures GDPR and CCPA compliance, and maintains high standards of data accuracy and privacy.
- Seamless Integrations: Integrates with popular CRM, marketing, and sales platforms for enhanced functionality and workflow efficiency.
Limitation of Zoominfo
There are certain aspects where Zoominfo might not be the greatest at. Such limitations of ZoomInfo that you need to be aware of are –
- Costly Pricing Tiers: ZoomInfo can be expensive for small businesses or startups, with higher pricing tiers designed for larger enterprises.
- Complex Interface: Some users may find the platform’s interface to be complex and overwhelming, especially for beginners.
- Limited Export Options: Exporting data from ZoomInfo can be limited in terms of file formats and may require additional manual formatting.
- Dependence on CRM Integration: To fully utilize ZoomInfo, integration with a CRM system is often necessary, which may not be feasible for all businesses.
- Focused on B2B mostly: ZoomInfo primarily caters to B2B businesses, so it may not be the best choice for companies with a strong B2C focus.
- Less Suitable for Niche Industries: In some niche industries or specific regions, ZoomInfo’s data coverage may not be as comprehensive.
Note: Try read more about ZoomInfo plugin.
Customer Review and Rating
Users are overwhelmingly positive about ZoomInfo SalesOS, praising its intuitive interface and user-friendly extensions. They report quick onboarding, with the tool becoming their go-to for business development.
Additionally, users command ZoomInfo’s exceptional customer support.
Zoominfo reviews suggest that the program has significantly lightened workloads for many users, streamlining the process of searching, researching, and filtering thousands of contacts daily.
A senior demand generation manager appreciates the tool’s ease of use in enriching contacts and seamless integration with CRM systems. They found the filtration system helpful, though a minor issue was noted with filtering exported contacts. The user emphasized the reliability of ZoomInfo’s data, underscoring its value for their team.
While the tool has received high praise, some users have identified minor areas for improvement. These include occasional delays with the Chrome extension and a minor glitch in the filtration system.
Some users expressed a desire for more flexibility in updating fields when exporting to CRM. Zoominfo pricing has also been a cause of concern for smaller businesses, and new users found the extensive features initially challenging to navigate.
Here are customer ratings as per popular review sites
| Platform | Overall Rating | Number of Reviews/Votes |
|---|---|---|
| G2 | 4.4 out of 5 | 7,627 |
| Capterra | 4.1 out of 5 | 274 |
| TrustRadius | 8.2 out of 10 | 1,631 |
What is ZoomInfo Used For?
ZoomInfo acts as a comprehensive data resource that aids businesses in their efforts to connect with potential clients, target specific audiences, and identify potential candidates for job openings.
Its extensive database and powerful search capabilities make it an indispensable tool for sales, marketing, and talent acquisition professionals.
Here’s an elaboration on how ZoomInfo is used for each of these purposes:
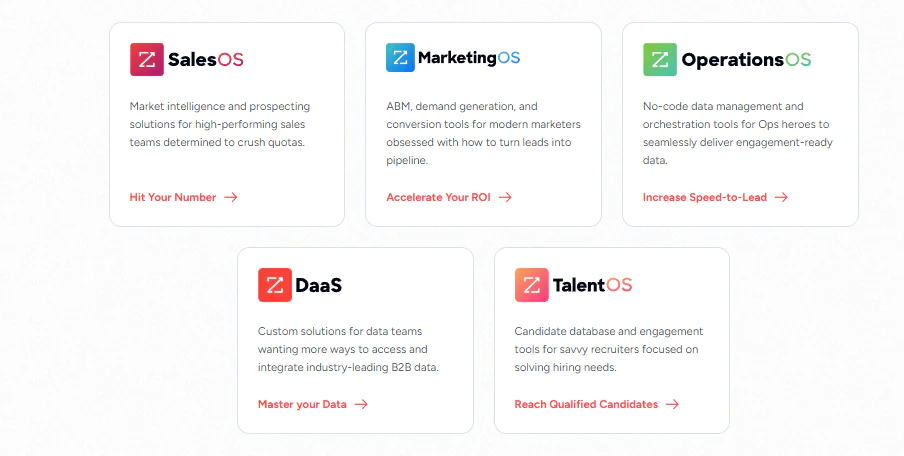
SalesOS
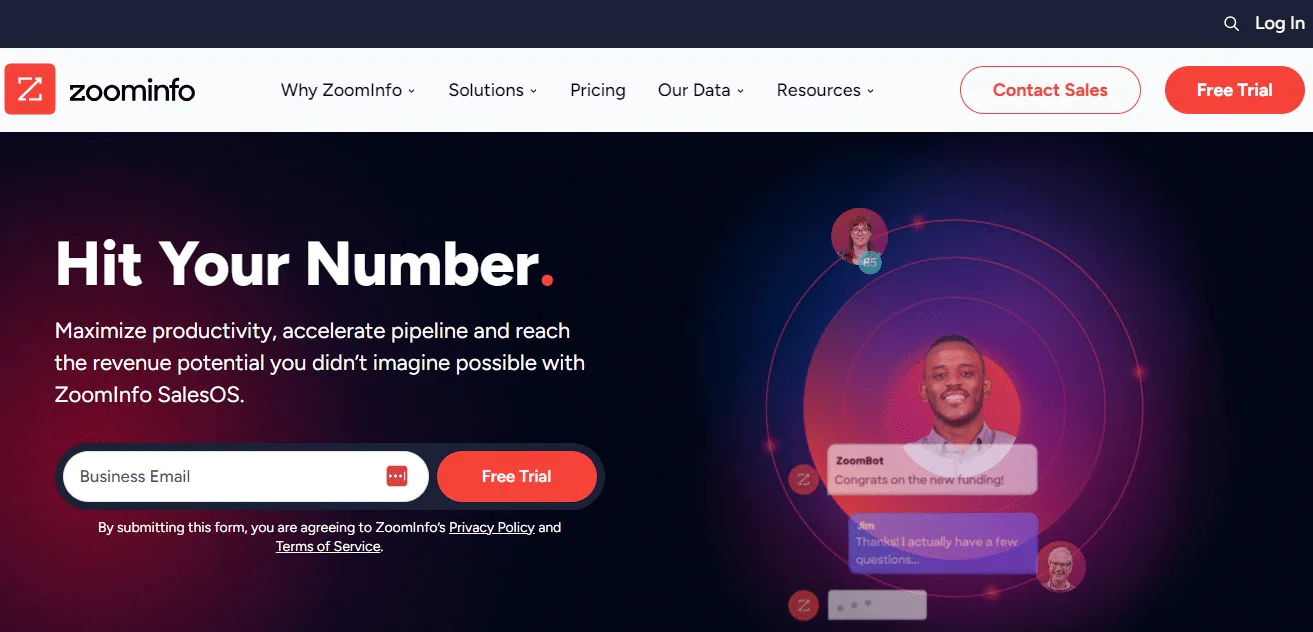
The purpose of SalesOS is to equip sales teams with accurate contact information, enabling them to generate leads, engage with potential clients, and accelerate the sales process.
Lead Generation
Similar to intent data providers, ZoomInfo provides a wealth of accurate and up-to-date contact information for professionals across industries. Sales teams can use this data to identify potential leads, decision-makers, and key contacts within target companies.
Company Insights
It offers detailed company profiles, including industry, size, location, and key personnel. This information empowers sales teams to approach potential clients with a deeper understanding of their business and needs.
Direct Communication
ZoomInfo provides direct phone numbers and email addresses, enabling sales representatives to reach out to prospects directly, streamlining the sales process.
MarketingOS

The primary goal of MarketingOS is to enhance marketing efforts by providing essential contact data, advanced company insights, and digital marketing tools for improved lead conversion and ROI.
Targeted Campaigns
Marketers can use ZoomInfo to build highly targeted prospect lists based on specific criteria like industry, job title, company size, and more. This ensures that marketing efforts are directed towards the most relevant and valuable leads.
Market Research
The platform offers insights into market trends, competitive landscapes, and company activities. This information is invaluable for crafting effective marketing strategies and campaigns.
Optimization and Alignment
They Convert site visitors into loyal customers and use accurate IP-to-company data for effective campaigns. Plus, they Integrate & automate GTM activities based on buying signals. This includes building automated workflows triggered by accurate insights.
Note: Try read more about how to buy leads.
Talent Acquisition
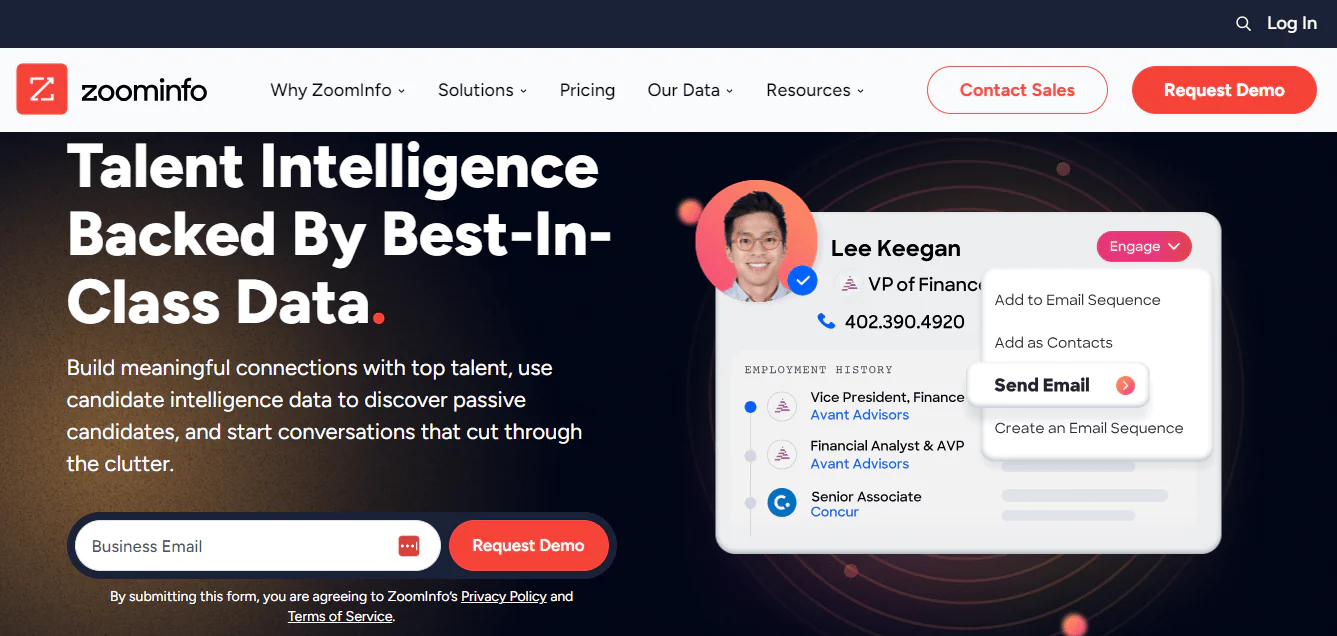
The primary goal of TalentOS is to streamline talent acquisition processes by offering advanced candidate search capabilities, sourcing intelligence, and engagement tools for efficient hiring.
Candidate Sourcing
Recruiters can use ZoomInfo to find potential candidates for job openings. It provides contact details and background information about professionals, making it easier to identify suitable candidates.
Company Insights for Recruitment
ZoomInfo offers insights into companies, which can be crucial for understanding potential employers and tailoring recruitment strategies.
OperationsOS (RingLead)

The purpose of OperationsOS is to automate data management, ensuring engagement-ready data through processes like deduplication, cleansing, enrichment, lead scoring, and lead routing.
Data Deduplication
Enhance data quality by matching and deduplicating records. Prevent the entry of erroneous data in real-time.
Data Cleansing and Enrichment
Transform and standardize records for a consistent, actionable format. Correct errors with ease. Augment customer views by funneling third-party data into your systems of record.
Lead Scoring and Shortening
Prioritize leads by segmenting and scoring them according to key attributes to concentrate on the most impactful prospects. Shorten sales cycles by smartly routing leads to the appropriate reps, taking into account territory and workload.
How Does ZoomInfo Work?
ZoomInfo employs advanced technology, a dedicated research team, and a variety of data sources to compile, verify, and organize a vast database of company and contact information.
This organized data is then made easily accessible to users, empowering them to make informed decisions in sales, marketing, and talent acquisition efforts.
Data Compilation Sources
ZoomInfo compiles its extensive database through a multi-faceted approach –
- Web Crawling: It scans the web, indexing information from various online sources, including websites, articles, press releases, job postings, and more.
- Third-Party Providers: ZoomInfo partners with trusted data providers to supplement its own data collection efforts.
- Community Contributions: Users can contribute data, helping to expand and enrich the platform’s database.
- Dedicated Research Team: A team of skilled data scientists and researchers verifies and curates the gathered information.
Data Organization and Accessibility
ZoomInfo categorizes data into detailed company profiles. This includes industry, size, location, key decision-makers, and more. This information is organized and easily accessible.
- Accurate Contact Data: The platform provides verified and up-to-date contact information for professionals across various industries. This includes direct phone numbers, email addresses, and more.
- Intent Indicators: ZoomInfo identifies buying signals and engagement levels, helping businesses target leads at the right time.
- Global Data Reach: The platform’s data spans across a wide range of industries and global regions, enabling businesses to refine their strategies on a global scale.
ZoomInfo Pricing Plans
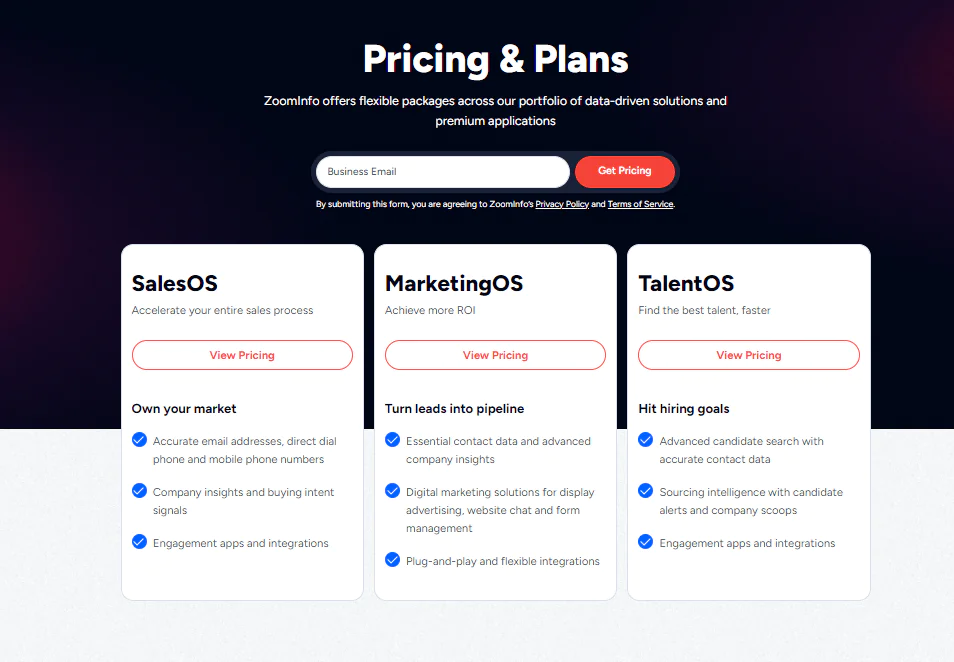
Note that there are no plans for ZoomInfo free of charge. Here’s a breakdown of the pricing and plans offered by ZoomInfo:
| Plan | Description |
|---|---|
| Business Email | – Accurate email addresses – Direct dial phone and mobile phone numbers – Company insights with buying intent signals – Integrates with engagement apps |
| SalesOS | – Accelerate the entire sales process – Accurate email addresses, direct dial, and mobile numbers – Company insights with buying intent signals – Integrates with various engagement apps |
| MarketingOS | – Achieve higher ROI – Turn leads into pipeline – Essential contact data and advanced company insights – Digital marketing solutions for display advertising, website chat, and form management – Supports plug-and-play and flexible integrations |
| TalentOS | – Find the best talent quickly – Assist in hitting hiring goals – Advanced candidate search with accurate contact data – Sourcing intelligence with candidate alerts and company scoops – Integrates with various engagement apps |
Why Look For ZoomInfo Alternatives?
There could be several reasons why someone might look for alternatives to ZoomInfo
- Cost Considerations: ZoomInfo might be expensive for some businesses, especially smaller ones or startups with tight budgets.
- Specific Industry or Region: Depending on the industry or region a business operates in, there might be specialized platforms or tools that cater specifically to their needs.
- Different Features or Focus: Some businesses might require features or a focus that ZoomInfo doesn’t specialize in, such as social media analytics, predictive lead scoring, or other specific functionalities.
- User Interface Preferences: Some users might prefer the user interface and experience of alternative platforms over ZoomInfo.
- Integration Capabilities: If a business heavily relies on specific CRM or marketing automation platforms, they might seek alternatives that integrate seamlessly with their existing tech stack.
- Customer Support and Training: Businesses might prioritize platforms that offer extensive customer support, training resources, or a dedicated customer success manager.
- Scalability: Depending on a business’s growth plans, they might need a solution that can easily scale with them.
- Trial and Error: Sometimes, businesses might try out alternative platforms to see if they better suit their needs or offer a different approach to achieving their goals.
Best Zoominfo Competitors
If you find yourself seeking more from your data solutions, especially after reading this comprehensive review of ZoomInfo, it might be worth exploring some alternative platforms. Here are a few notable alternatives to consider:
Swordfish AI
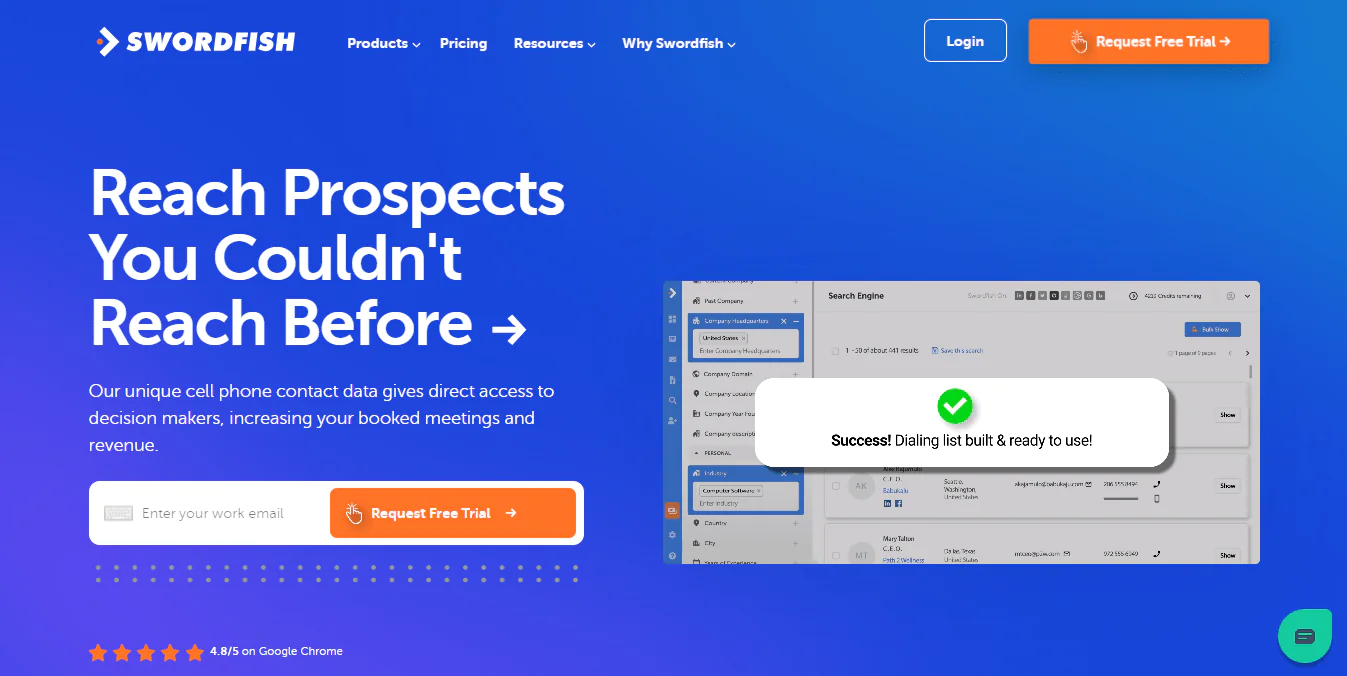
Swordfish AI is a sales intelligence platform that equips businesses with comprehensive data solutions for lead generation and prospecting.
As a prominent contact-finding platform, it’s renowned for its extensive database, meticulously curated with over 3.5 billion data entries. This rich resource includes verified cell phone numbers and email addresses, providing businesses with invaluable leads.
With collaborations extending to over 200 active data partners, Swordfish AI boasts an impressive user base of 70,000, along with an astonishing 15,000+ Chrome installations.
Notably, it achieves a remarkable 400% increase in cleared candidates, doing so at five times the speed of comparable platforms.
While specific pricing details are not disclosed, the fact that industry giants such as Amazon, Tesla, and Microsoft are counted among Swordfish AI’s clientele speaks volumes.
Lusha
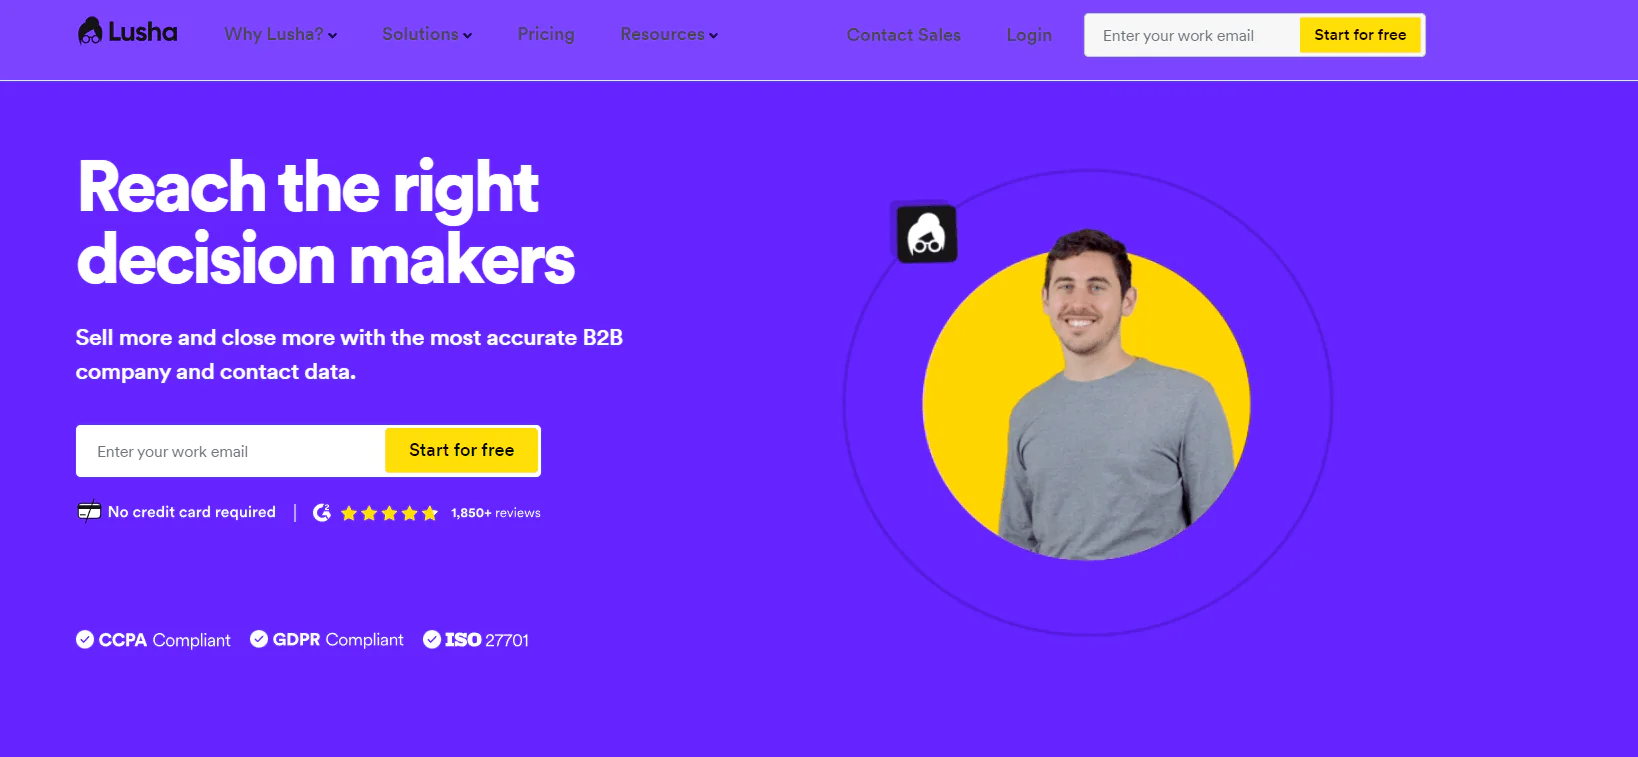
Lusha is a distinguished contact information platform, renowned for its vast database of meticulously curated business data. With over 70 million verified contact details, including direct phone numbers and email addresses, Lusha provides businesses with valuable leads to drive their growth.
With over 45 million direct contacts in North America, it provides a rich pool of connections for targeted outreach. The platform also boasts 50 million detailed enterprise business profiles, along with 44 million SMB business profiles, offering a comprehensive view of businesses of varying scales.
In addition, Lusha provides access to 21 million GDPR-compliant European contacts, ensuring compliance with data protection regulations and facilitating international networking opportunities.
Uplead
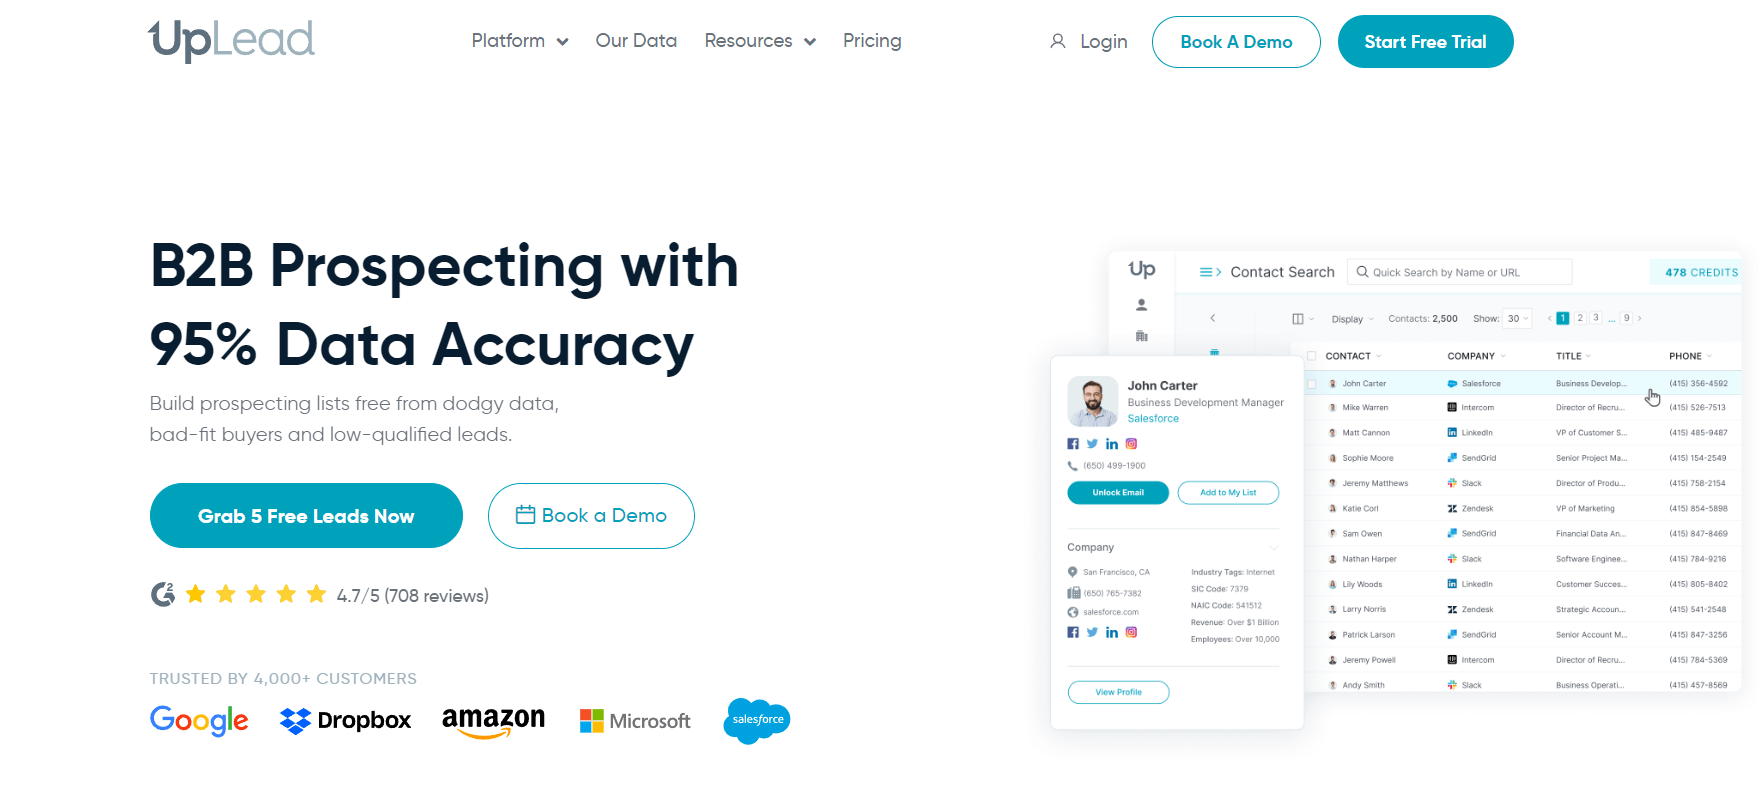
UpLead is a B2B lead intelligence platform renowned for its 95% accuracy guarantee in its extensive contact database. It empowers sales teams, driving lead generation and revenue growth through targeted campaigns.
With a wealth of features, including a 140+ million B2B email address database and over 50 search criteria filters, UpLead stands as a formidable alternative to ZoomInfo, offering superior ease of use, setup, and admin, along with quality support and product direction.
UpLead offers seamless integration with leading CRM platforms like Salesforce and HubSpot, ensuring a smooth workflow for your sales and marketing teams.
Additionally, it boasts an extensive integration capability with over 1,500 apps through Zapier, providing flexibility and compatibility with your existing tech stack.
With over 16,000 tracked technologies, UpLead enables dynamic prospect list building based on technographics.
Conclusion
To answer, what is Zoominfo? ZoomInfo is a popular research and lead-generation tool suitable for businesses of various sizes. It offers a wide array of features including lead searching, list creation, and active sales tracking.
While ZoomInfo may not be the most budget-friendly option available, its pricing is competitive when compared to similar platforms.
For those in search of a more cost-effective yet reliable zoominfo alternative, Swordfish is highly recommended. With its affordability and reliability, Swordfish presents a compelling option for businesses looking to enhance their lead generation efforts.
FAQs
Is ZoomInfo legal?
Yes, ZoomInfo operates within the bounds of legal and regulatory frameworks. They have strict policies in place to ensure compliance with data privacy laws, including regulations like GDPR (General Data Protection Regulation) and CCPA (California Consumer Privacy Act).
How does ZoomInfo gather its data?
ZoomInfo collects data from a variety of publicly available sources, user contributions, and partnerships with reputable data providers. It uses advanced algorithms to aggregate, validate, and update the information.
Is the data provided by ZoomInfo accurate and up-to-date?
ZoomInfo takes extensive measures to ensure the accuracy and freshness of its data. It employs a combination of automated processes and manual verification to maintain high data quality standards.
How Does Zoominfo Compare to UpLead and Other Competitors?
When comparing Zoominfo with other competitors in the B2B lead generation industry, it is clear that Zoominfo offers more robust options beyond Uplead. With its wide range of features and comprehensive database, Zoominfo stands out as a powerful tool for businesses looking to enhance their marketing and sales efforts.
What industries does ZoomInfo cater to?
ZoomInfo serves a wide range of industries across various sectors, including technology, finance, healthcare, manufacturing, and more. Its database covers a diverse array of businesses and professionals.